If you send people out of chat to book a meeting, you lose some of them. A Calendly AI booking chatbot keeps the whole flow in one place: qualify the request, show 3–5 open slots, confirm the time, and book the meeting without making the user leave the conversation.
I’d set it up like this: connect Calendly to your calendar, create separate event types for sales, demos, and support, limit the bot to approved meeting types, and make it collect only the details needed before it checks availability. Then I’d test time zones, conflicts, invalid emails, buffer times, and minimum notice rules before launch.
Here’s the short version:
- Calendly handles availability and booking
- ChatSpark handles the conversation
- The bot should qualify first, then show times
- Use U.S. date/time format, like Tuesday, March 4 at 10:00 AM ET
- Collect only key fields: name, email, reason, time zone, and company if needed
- Map each request to one meeting type
- Re-check the slot before booking
- Track completion rate, routing accuracy, and time to booking
A few numbers matter here. Showing 3–5 time slots helps keep choices simple. A 10–15 minute buffer can help prevent back-to-back pileups. And a 4-hour or 1-day minimum notice can stop last-minute bookings from throwing off the day.
The main point: I’d keep scheduling inside the chat, limit what the bot can book, and let Calendly be the source of truth for open times.
That’s what this article walks through in plain terms.
Set up Calendly for conversational booking
Before you connect a chatbot, make sure your Calendly account is set up the right way. The chatbot can only book what Calendly is already set to handle. If the setup is off, booking tends to break in annoying ways later.
Create event types and define booking rules
Each meeting your chatbot books should have its own Calendly event type. For U.S. sales and support teams, common examples include Sales Consultation (30 minutes), Product Demo (30 minutes), Support Escalation (15 minutes), and Strategy Session (60 minutes).
For each event type, set the working hours, meeting length, and buffer times. A 10–15 minute buffer usually works well. It gives people breathing room and helps avoid one meeting crashing into the next. You should also set a minimum notice period of 4 hours or 1 day so people can’t book at the last second and throw off the day.
Connect calendars and confirm availability logic
Calendly also needs a connected calendar, such as Google Calendar or Outlook, so it can check whether a time slot is open. Without that connection, the chatbot has no solid way to know if a host is free.
After the calendar is connected, Calendly checks the host’s existing events against the working hours you set. If the host already has a meeting or even a personal appointment on the calendar, that time shows as unavailable. Calendly decides whether a slot is open, not the chatbot. New bookings are then written straight to that calendar, so the host can see everything in one place.
Map each meeting type to a chatbot intent
Each visitor request should map to the right Calendly event type. If someone says "I want to talk to sales," that should send them to the Sales Consultation event. "Can you show me the product?" should map to Product Demo. And "I need help with support" should route to Support Escalation.
That mapping helps the chatbot send people down the right booking path instead of making them pick from a pile of meeting options.
| Calendly Setup Item | What It Enables in the Chatbot | Example |
|---|---|---|
| Event Type | Defines the meeting purpose | "Show me the product" → Product Demo |
| Duration & Buffers | Controls slot length and spacing | 30-min demo + 15-min buffer |
| Connected Calendar | Blocks times already on the calendar | Blocks time already taken by other meetings |
| Booking Rules | Sets notice periods and daily limits | Minimum 4-hour notice prevents instant surprises |
| Location Settings | Auto-generates a meeting link | Adds a meeting link to the invite |
| Host Assignment | Routes to the right team member | "Any available" or a specific rep |
Connect ChatSpark to Calendly and define booking permissions
After Calendly is set up, connect it to ChatSpark so each tool does its own job: ChatSpark handles the conversation, and Calendly handles availability and booking. Once that connection is live, tighten access so ChatSpark can only use what it needs.
Authorize the integration and choose approved event types
Open the AI Actions tab in your ChatSpark dashboard, find Calendly in the integration library, and click Connect. Pick the AI agent or agents that should use the integration, then click Connect with Calendly, sign in to your Calendly account, and click Allow when Calendly asks you to review permissions.
Keep permissions narrow. Give access only for reading availability and creating bookings. Skip admin-level access unless your setup depends on it.
After authorization, build a clear allowlist of approved event types. For example, a sales bot should only be able to use the 30-minute Sales Consultation, while a support bot should only be able to use the 15-minute Support Escalation. That way, the chatbot doesn't accidentally show internal or restricted meeting types that customers were never supposed to see.
Choose what the chatbot must collect before checking times
Before the chatbot checks Calendly for open slots, it needs enough detail to send the request to the right place. At a minimum, collect name, email, company (if relevant), reason for the meeting, and time zone. Those details help ChatSpark route the request correctly.
After that, only ask for details that change routing or help the host get ready. For a sales conversation, company size and product interest make sense. For a support escalation, the account identifier and issue category are usually enough. If a detail won't affect booking, don't ask for it, especially if it's sensitive.
Describe the booking sequence used in ChatSpark
Once the right fields are in place, the booking flow can move ahead. The sequence should follow the same order every time: detect intent → map the request to an approved event type and host → show a few open times → collect the booking details → create the booking in Calendly → return confirmation in the same chat thread [2][3][4].
After the user picks a time, ChatSpark sends the selected slot and invitee details to Calendly through the API. The confirmation message returned in the same conversation should include the meeting name, date, time zone, host name, and the video link or meeting location when available.
Once that flow is working, move on to time-zone and conflict testing. Then shape the conversation so it qualifies the user before showing times.
Design the conversation flow that qualifies, offers times, and confirms the meeting
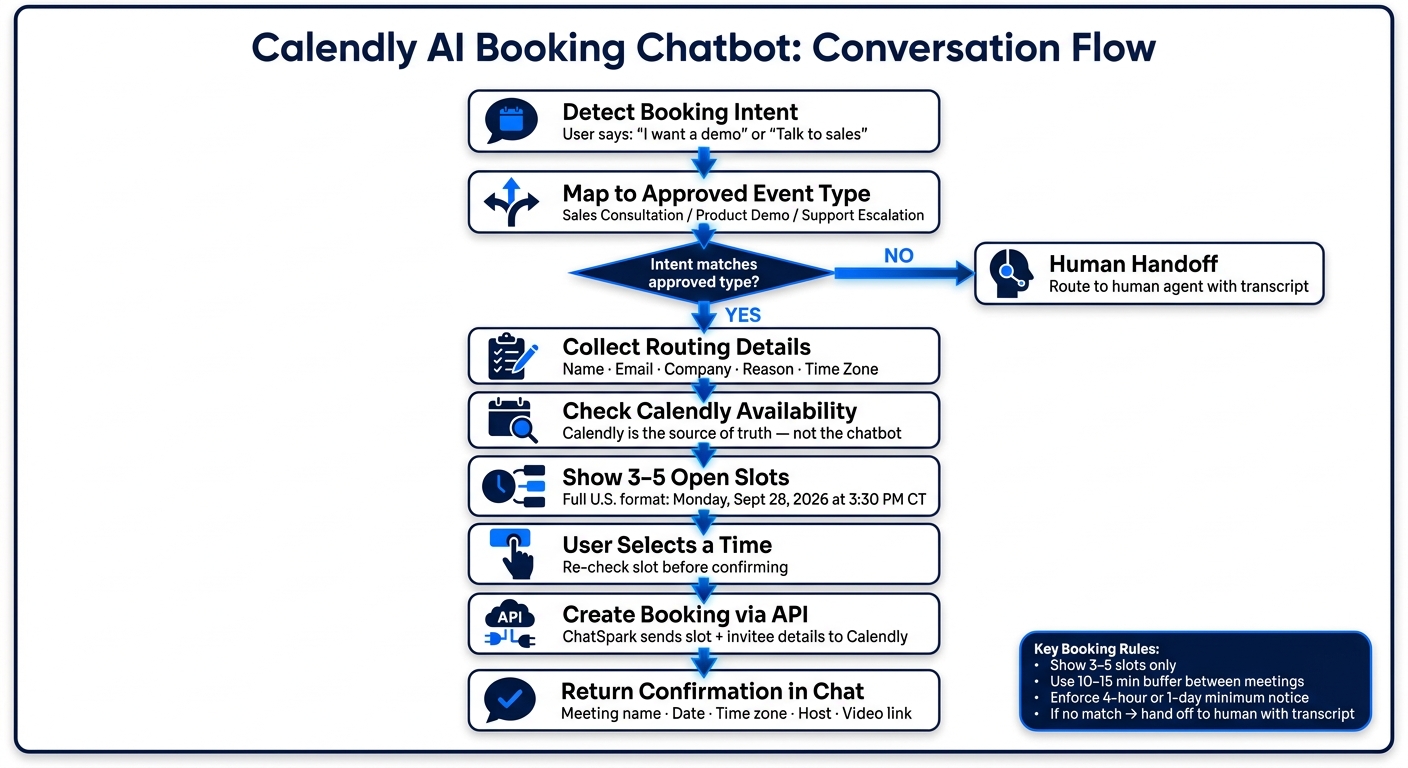
Calendly AI Booking Chatbot: How the Conversation Flow Works
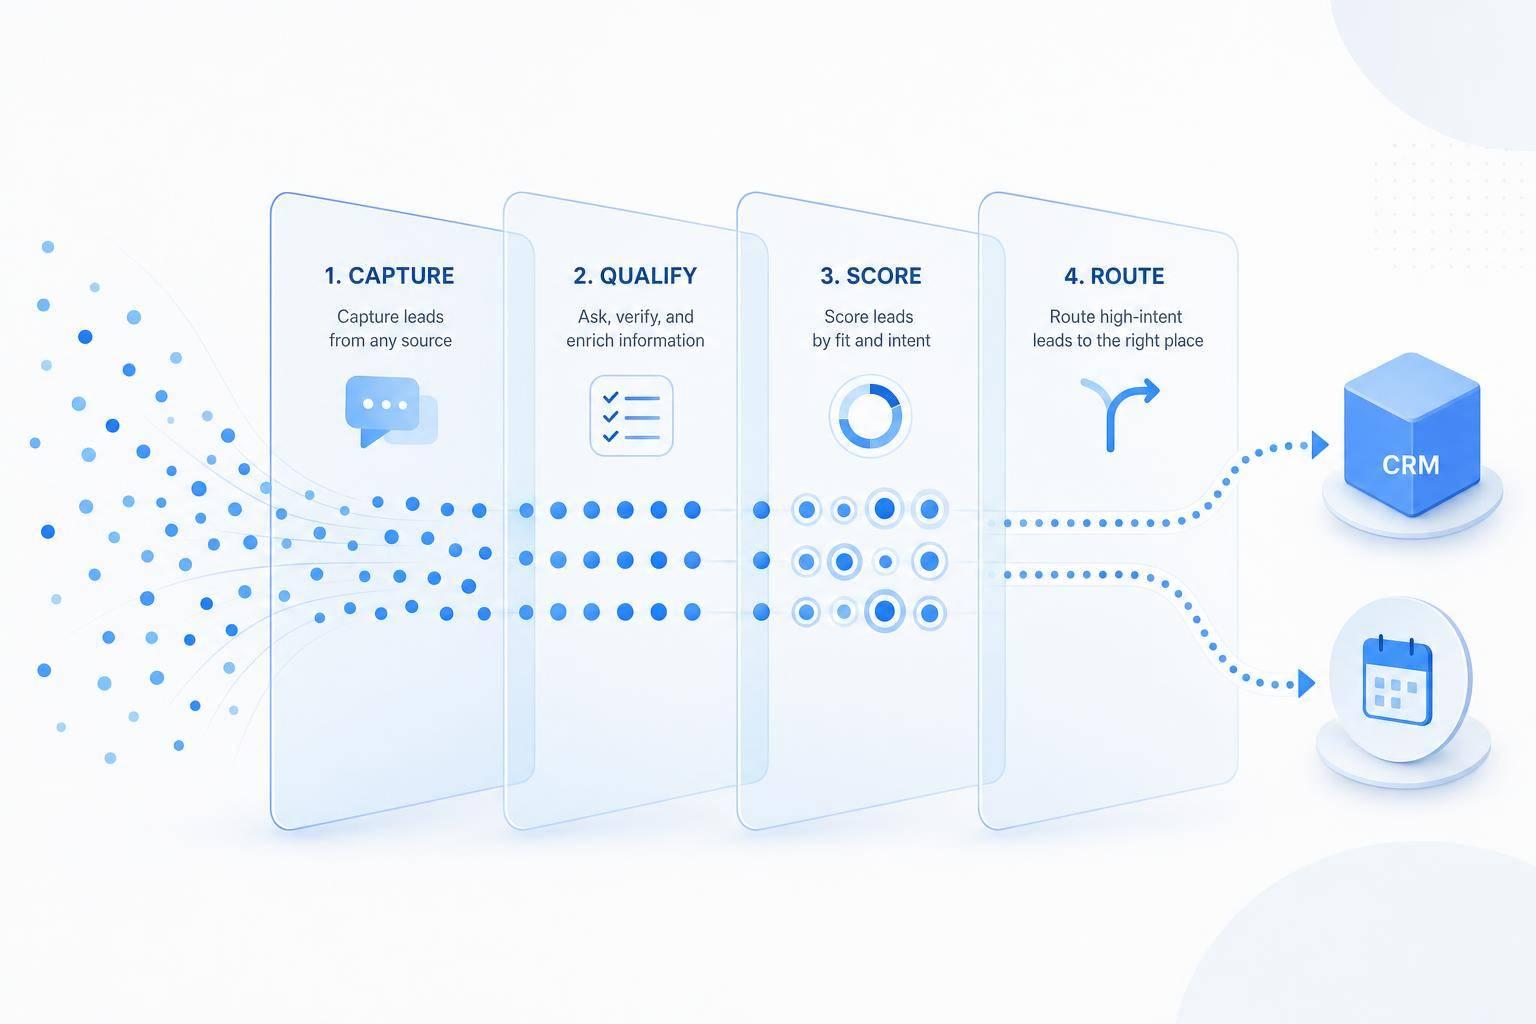
Qualify first, then show times, then confirm the booking. The key idea is simple: don’t show Calendly times until the chatbot knows what kind of meeting the person needs.
Qualify intent before showing time slots
The chatbot should spot booking intent from natural-language messages before it does anything else. Messages like "I want a demo", "I'd like to talk to sales", or "Can someone help with billing?" should each map to a specific Calendly event type.
From there, the flow should be tight and direct:
- Detect the user’s goal
- Confirm the meeting type
- Collect only the routing details needed
- Route to the approved event type
If the request doesn’t match an approved booking rule, send it to a human instead. Pass the transcript with the handoff so the agent can see the request context right away.
Once the intent is clear, move straight to available times.
Present available slots in U.S. date and time format
Ask for the user’s preferred day, time range, and time zone in one step. If the platform can detect the time zone on its own, confirm it instead of assuming. For example: I detected Eastern Time. Is that correct?
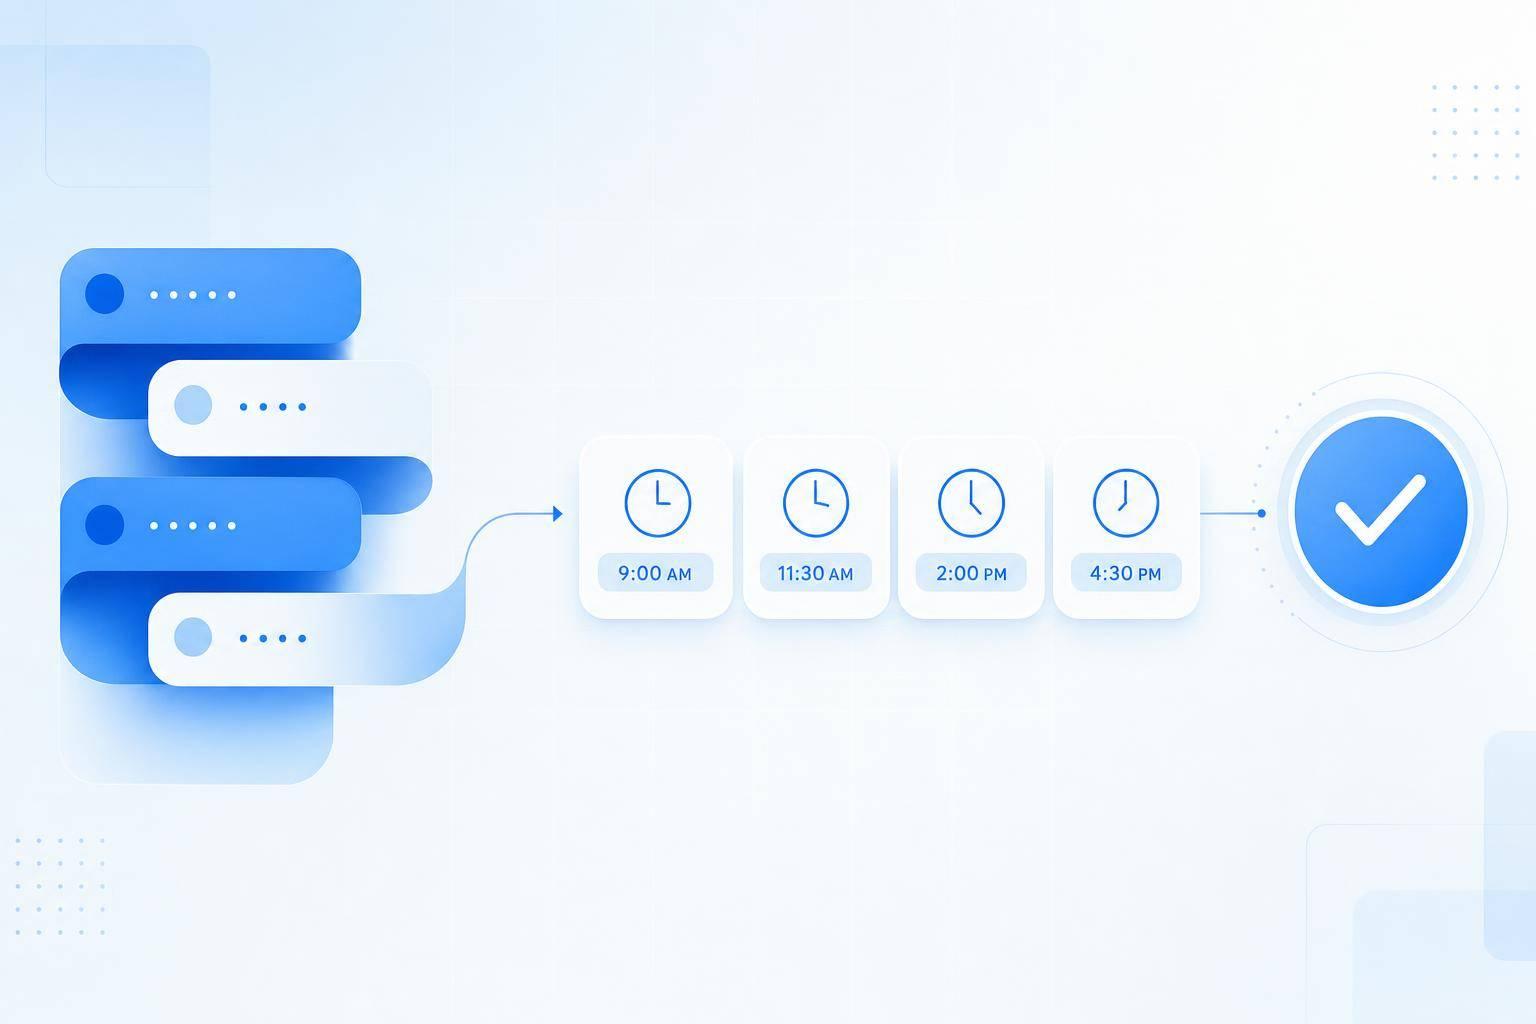
Show three to five open slots in full U.S. format, and put a time zone label on every line. For example, Monday, September 28, 2026 at 3:30 PM CT.
Before the chatbot locks in the meeting, it should check the selected time again and summarize the key details:
- Meeting name
- Date
- Time zone
- Host or team
- Invitee email
If the slot is no longer open, say it plainly and give the nearest options. For example: That time was just taken. Here are the next available options.
The examples below show how that flow works for sales, support, and demo scheduling.
Short examples for sales, support, and demo scheduling
Workflow example: sales lead qualification
User: I'd like to talk to sales. Chatbot: What are you hoping to accomplish? User: We want to automate customer support. Chatbot: How many people would use it, and when are you hoping to decide? User: About 50 people, and this quarter. Chatbot: A sales consultation is the best fit. I found Monday, September 28, 2026 at 3:30 PM CT and Tuesday, September 29, 2026 at 10:00 AM CT. Which would you prefer?
Workflow example: support escalation
User: I need help with billing. Chatbot: What issue are you experiencing? User: My invoice still shows an incorrect charge after I updated the plan. It's unresolved. My account email is user@example.com. Chatbot: I'll schedule a billing-support escalation. Please choose a time: Wednesday, September 30, 2026 at 1:00 PM ET or Thursday, October 1, 2026 at 9:30 AM ET.
Workflow example: demo scheduling
User: Can I see a demo? Chatbot: Which product or feature would you like to see? User: The analytics dashboard. Chatbot: What name and email should I use for the invitation? Chatbot: I found Friday, October 2, 2026 at 11:00 AM PT and Monday, October 5, 2026 at 2:30 PM PT. Which time works better?
In each example, the chatbot qualifies intent before it checks availability, shows open slots in full U.S. format with a time zone on every line, and confirms the booking in the same chat.
Next, test the flow across time zones, conflicts, and edge cases.
Test the workflow and measure booking performance
Run booking tests across time zones, conflicts, and edge cases
After you build the booking flow, put it under pressure before launch. Test the smooth path, but also test conflicts, bad inputs, and the weird stuff users always seem to find. You want to check intent detection, slot display, and confirmation in conditions that feel close to actual use.
Here are the main checks to run before launch:
| Test Condition | Expected Chatbot Behavior | Expected Calendly Result |
|---|---|---|
| U.S. time zone shift (e.g., PST vs. EST) | Displays slots in the user's local time | Event created at the correct UTC offset |
| Calendar conflict | Hides slots that overlap with existing busy events | No double-booking allowed |
| Buffer time | Skips slots that fall within padding before/after meetings | Respects configured buffer settings |
| Minimum notice | Does not offer slots within the restricted lead-time window | Respects Calendly's minimum notice setting |
| Invalid email address | Flags the format error and re-prompts before proceeding | No booking is created until the email is valid |
| Session timeout | Ends the session after the configured inactivity window and offers fresh options on return | Slot stays open for other users |
| Ambiguous intent | Hands off to a live agent with the transcript | No booking made; transcript saved for handoff |
Track drop-offs, completion rate, and routing accuracy
Use the test results to set launch benchmarks.
After launch, check the ChatSpark Analytics tab to see where users leave the booking flow [1]. Watch drop-offs, event-type accuracy, no-slot cases, and booking completion. For the first month, review chat logs every week and tag conversations by intent, such as booking, pricing, or rescheduling, and by outcome, such as booked, escalated, or abandoned [5].
If one step starts losing users, tighten that part of the flow. If users keep landing on the wrong event type, fix the intent mapping. Small misses here can snowball fast.
The metrics that matter most are booking completion rate, routing accuracy, and time to booking. Those three tie straight to the main goal of the setup: fewer drop-offs, faster conversions, and smoother in-chat booking.
Conclusion: What to set up first for a smoother booking experience
Once testing looks stable, start with clean event types, tight intent mapping, and live U.S.-formatted availability. Confirm the booking only after Calendly returns success.
FAQs
How does the chatbot avoid double-booking?
The chatbot checks your connected Calendly account in real time, so it only shows time slots that are actually open.
Once someone chooses a time, the booking goes through the Calendly API and is placed on your calendar right away. That keeps your availability up to date and helps stop double-booking.
What should the bot ask before showing time slots?
Before showing open time slots, the chatbot should collect a few key details to make sure the meeting makes sense.
That usually means asking about the user’s preferences, budget, timeline, and contact details like their name and email address. Getting this information first helps the AI gauge intent and helps sales or support teams spend time on the prospects most likely to move forward.
What if a selected time becomes unavailable?
If a selected time becomes unavailable, ChatSpark keeps things smooth with fallback responses that help the user pick the next step.
To cut down on conflicts, it helps to centralize your booking links and include a fallback option. For example, you can offer to email a direct booking invitation if the calendar doesn’t load.