Need a 24/7 AI customer service agent on your website? Here's how to set one up in just 10 minutes using ChatSpark. This no-code tool lets you:
- Train the AI with your website's content or uploaded files.
- Customize its tone, appearance, and greeting messages.
- Enable multilingual support for over 85 languages.
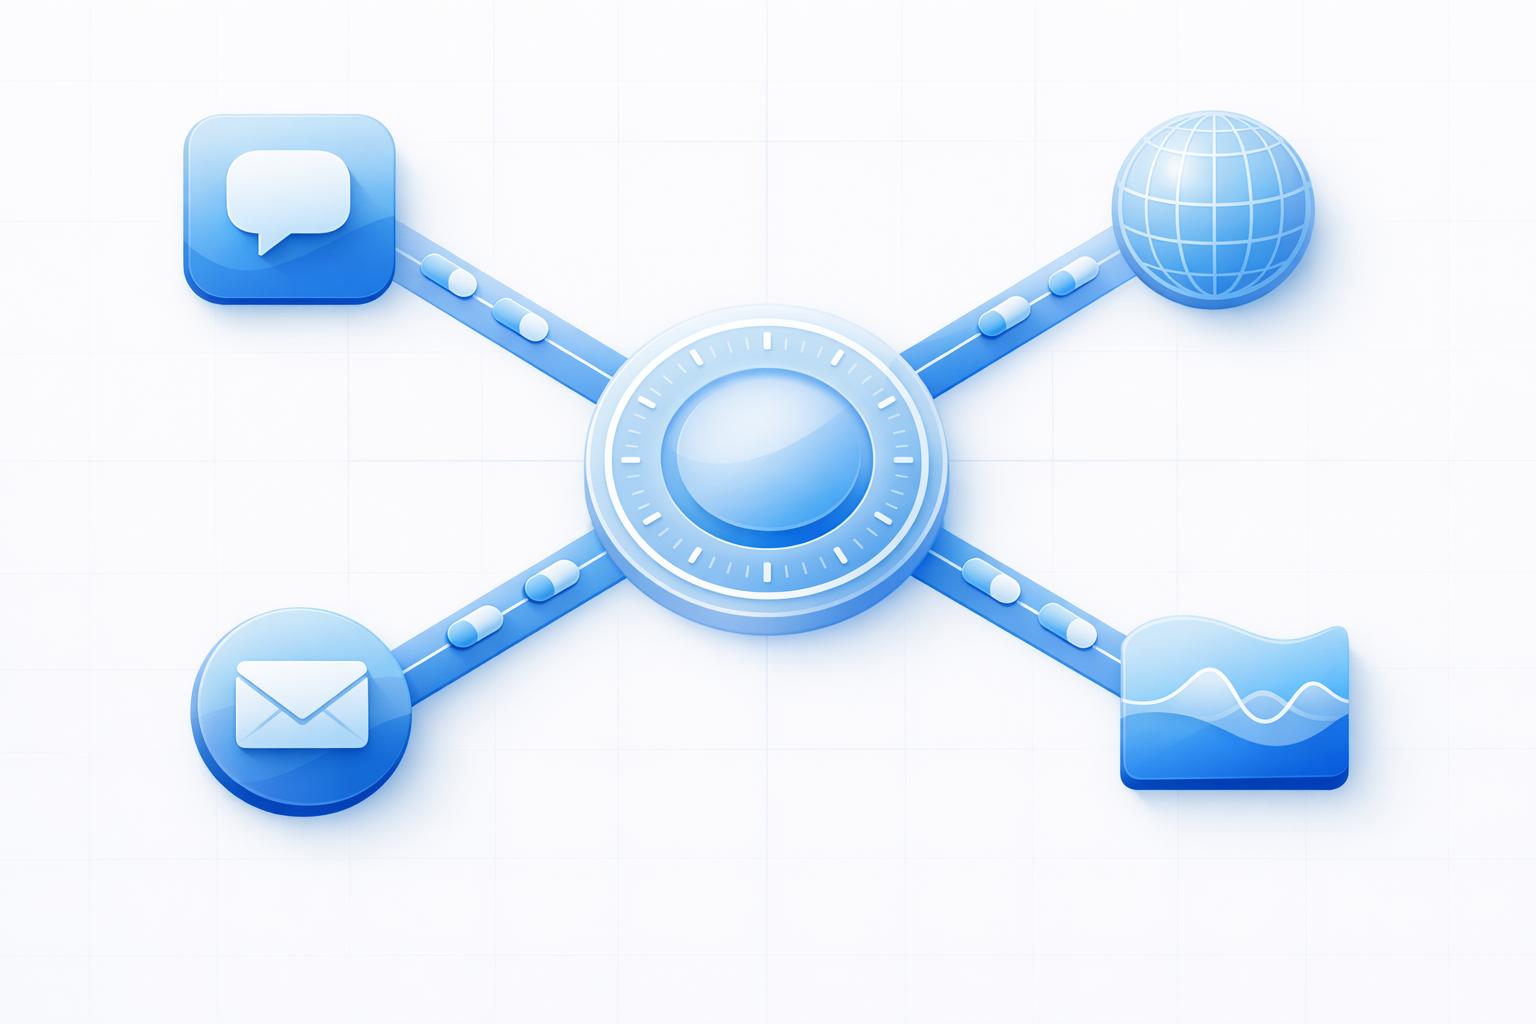
- Integrate with tools like CRMs, email platforms, or booking systems.
- Embed the widget on your site with a simple code snippet.
ChatSpark’s Basic plan starts at $19/month and offers a 14-day free trial. Follow these steps to save time, reduce support tickets, and improve customer experience.
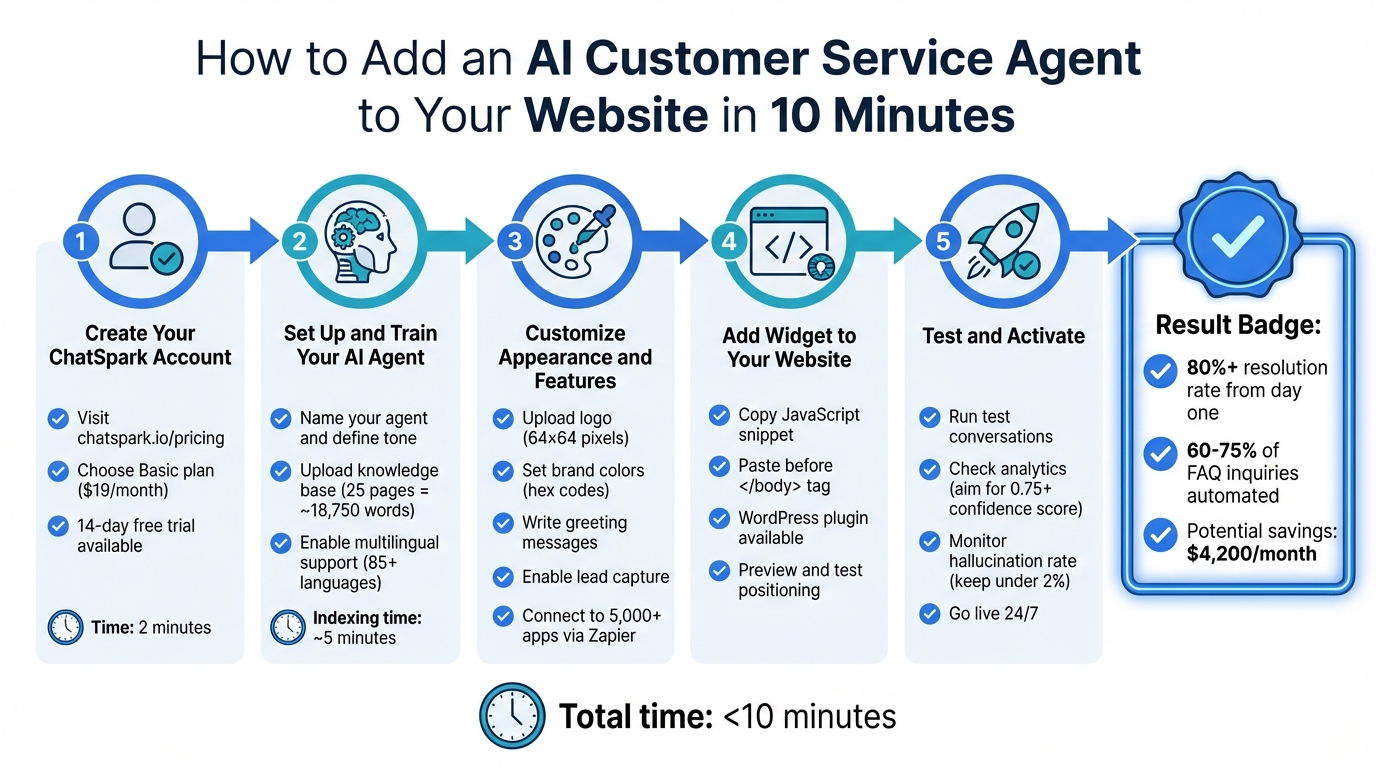
How to Set Up an AI Customer Service Agent in 5 Steps
Step 1: Create Your ChatSpark Account
Register for an Account
Visit chatspark.io/pricing and choose the Basic plan for $19/month. This option is ideal for entrepreneurs and beginners, offering 100 messages per month, one AI agent, and 25 pages of training data - plenty to address common customer inquiries for a small to medium-sized website.
To start your 14-day free trial, you'll need to provide a valid email address and credit card information. While ChatSpark asks for payment details upfront due to immediate infrastructure and AI training costs, you won’t be charged until the trial ends[2]. If you decide it’s not the right fit, simply cancel before the 14 days are up.
"Your 14-day trial gives you full access to the Basic plan. A credit card is required to start, but you will not be charged until the trial ends." – ChatSpark Pricing FAQ[2]
After completing your registration, check your inbox for a welcome email with your login credentials. If you don’t see it within a few minutes, make sure to check your spam or promotions folder[1].
Open the ChatSpark Dashboard
Log in using the credentials from your welcome email. The dashboard serves as your main hub, where you’ll create and manage your AI agent, upload training data, customize its appearance, and track performance using analytics[1][3].
Once logged in, click on "AI Agents" in the left-hand menu and select "Create AI Agent" to start setting things up. The process is quick and easy, taking less than 5 minutes to complete. You'll be guided through four simple steps to configure your AI agent[1].
Step 2: Set Up and Train Your AI Agent
Name Your Agent and Define Its Tone
Start by giving your AI agent a name, like "ChatSpark Assistant" or "Support Bot", to clearly identify it as an AI. Include a short description of your business (just one or two sentences) to provide context for the agent. For example: "We specialize in eco-friendly home cleaning products and ship across the U.S."
Next, choose a communication tone that aligns with your brand's voice. For a law firm, a "Professional" tone works well, while a skateboard shop might prefer a "Friendly" or "Casual" tone. This choice ensures your agent's responses reflect your brand's personality.
After setting the tone, focus on providing your agent with high-quality content to ensure accurate and helpful answers.
Add Your Knowledge Base
To handle customer questions effectively, your AI agent needs reliable and current information. You can upload training data by providing your website URL for automatic crawling or by uploading files in formats like PDF, Word, PPT, CSV, or plain text [4].
"Your AI agent is only as good as its training data." – ChatSpark Documentation [4]
Focus on uploading targeted material. Include essential resources like FAQs, pricing details, return policies, and product guides. Avoid unrelated content like blog archives or promotional materials that might confuse the AI.
In ChatSpark, one page of content equals about 750 words, and the Basic plan allows for 25 pages (around 18,750 words) [4].
Organize your content with clear titles (e.g., "How to Reset Your Password" instead of "Account Help") and use headers, bullet points, and formatting to make the structure easy to follow. Initial indexing for a standard help center takes approximately 5 minutes [5].
To keep your knowledge base up to date, enable automatic re-crawling. You can set this to occur daily or weekly, ensuring your AI always reflects the latest information. Adjust the re-crawling schedule in your knowledge base settings as needed.
Once your content is uploaded, consider enabling language support to expand your reach.
Enable Multilingual Support
ChatSpark offers support for over 85 languages [6], making it easier to serve customers worldwide without needing a multilingual team. Activate this feature in your settings and select a default language (like English) as a fallback. To ensure accuracy, upload training materials in each language you plan to support.
For instance, if you serve Spanish-speaking customers, include Spanish versions of your FAQs and help guides. This ensures the AI generates accurate and contextually appropriate responses.
Before launching, test your multilingual setup by running conversations in different languages. Check that product names, technical terms, and brand-specific phrases are translated correctly. If you notice any errors, you can add custom translations for specific terms to maintain consistency across languages [7].
Step 3: Customize Your Agent's Appearance and Features
After training your AI agent, it's time to make it visually and functionally align with your brand.
Upload Your Logo and Choose Colors
Head over to the Settings tab in your ChatSpark dashboard to match the widget's design with your brand identity.
- Use your brand's hex code (e.g., #0083D3) to set the primary colors for the widget.
- Upload your Agent Avatar, which is the logo or image displayed in the widget header and next to every AI response. Make sure it's a square image (64x64 pixels, PNG or JPG).
- Set a public-facing Agent Name that users will see during interactions.
From there, you can also tweak your greeting and automated lead capture settings to make the experience more engaging for users.
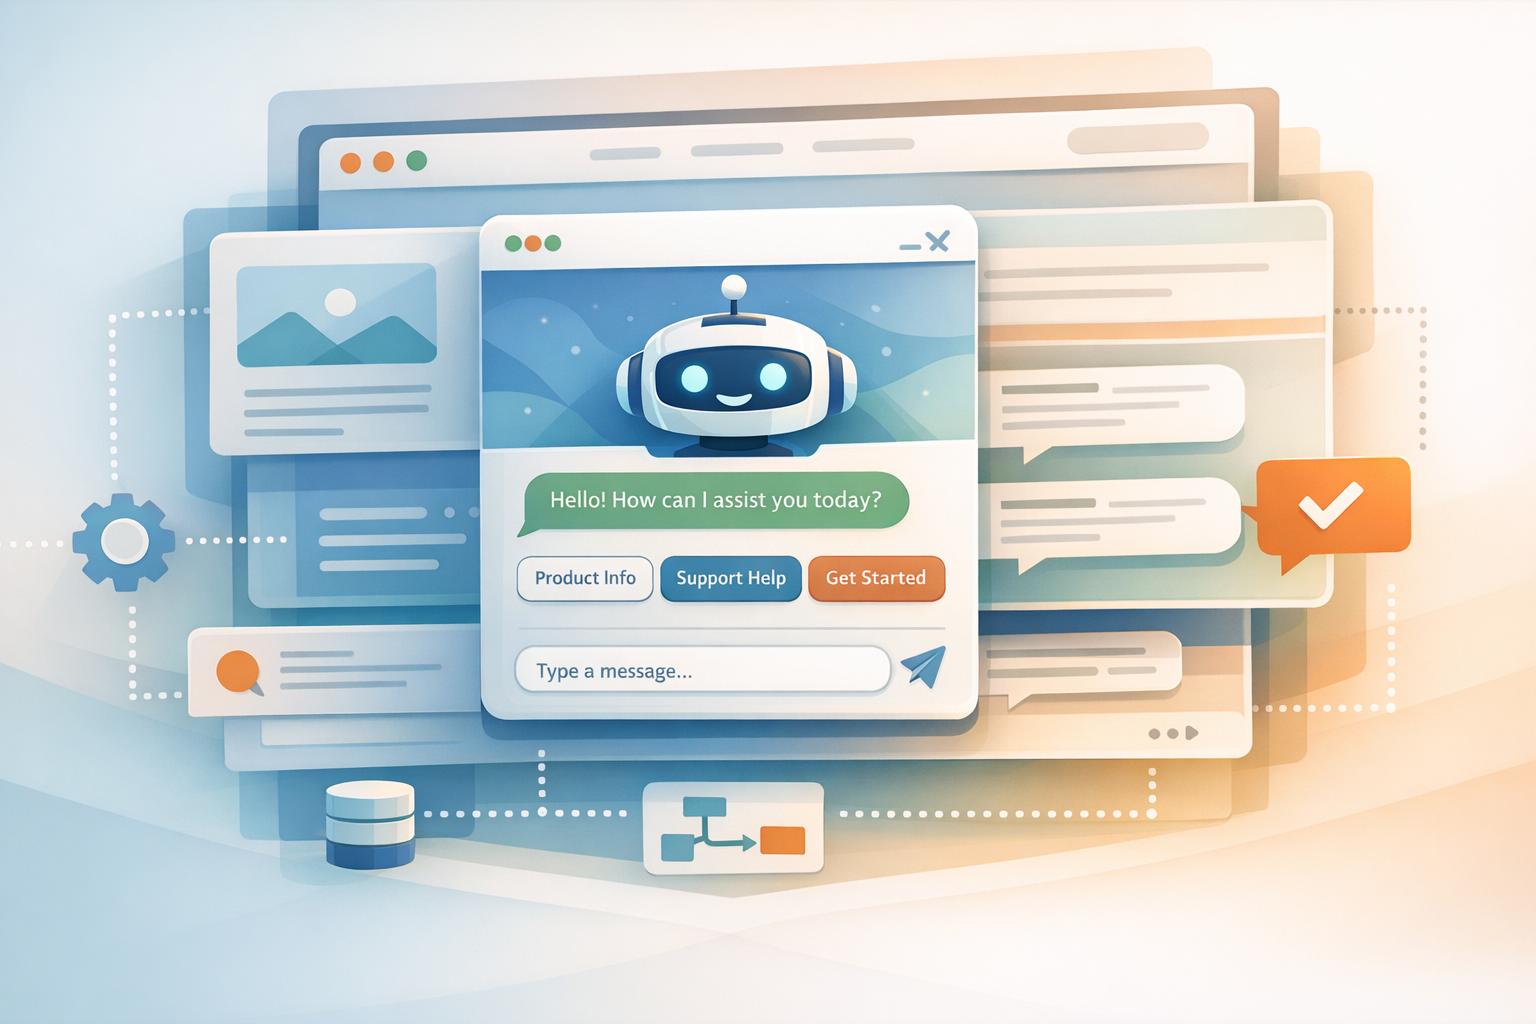
Write Greeting Messages and Enable Lead Capture
The Welcome Message is your agent's first impression - make it count. Use it to greet visitors and explain your agent's capabilities. For instance:
"Hi there! I'm here to help you with our products or pricing."
To make it more engaging, include bold text, bullet points, or links to direct users to important resources. You can also add up to five Suggested Prompts - these are clickable conversation starters based on common questions. For example:
- "What are your pricing plans?"
- "How do I reset my password?"
For gathering visitor information, go to Settings → Lead Capture. Choose which fields to collect, such as name, email, phone, company, or a custom message. You can trigger lead capture automatically when the chat opens or based on specific keywords during the conversation. Once collected, leads can be exported as a CSV file or sent directly to your CRM using integrations.
Connect ChatSpark to Other Tools
After customizing your agent's appearance and interactions, enhance its functionality by integrating it with other tools.
ChatSpark supports over 5,000 apps via Zapier. Popular integrations include CRMs like Salesforce and HubSpot, email tools like Mailchimp and ActiveCampaign, and helpdesk platforms like Zendesk and Freshdesk.
For real-time actions during chats, consider enabling AI Actions (available with the Pro plan for $129/month). This feature allows your agent to perform tasks like creating CRM contacts or opening support tickets directly in the chat.
You can also connect booking tools like Calendly, Google Calendar, or Square Appointments, letting users schedule meetings without leaving the chat. If a situation requires human support, set up live agent handoffs through platforms like Freshchat or Intercom. Use trigger words such as "human" or "help" in your Canned Responses settings to make the transition seamless.
Step 4: Add the ChatSpark Widget to Your Website
Now that your AI agent is set up and tailored to your needs, it’s time to embed it on your website. Whether you’re using WordPress, Shopify, Squarespace, Wix, or a custom-built site, this step ensures your AI agent becomes an integral part of your site.
Get Your Widget Code
Start by logging into your ChatSpark dashboard. Head over to the AI Agents section in the sidebar, find your agent, and click its code icon. In the setup field, add your website domain(s) to authorize the widget for your site.
Once done, the dashboard will generate a JavaScript snippet that looks like this:
<script src="https://chat.chatspark.io/loader.js" data-chatbot-id="YOUR_ID"></script>
Copy this snippet to your clipboard.
Install the Code on Your Site
To embed the widget, paste the script into your website’s HTML right before the closing </body> tag.
- WordPress Users: Install the official ChatSpark plugin from the WordPress directory. Then, grab your AI Agent ID from the dashboard and paste it into the plugin settings under WordPress Admin → ChatSpark → AI Agent ID.
- Shopify, Wix, or Squarespace Users: Add the script to your theme’s custom code section. This is typically found under settings or advanced options, often labeled as "Custom HTML" or "Code Injection."
Want to trigger the chat from a specific button instead of the default chat bubble? Add class="cs-trigger-agent" to the button’s HTML. You can even pre-fill the chat with a message by adding an attribute like data-trigger="I need help with pricing".
Adjust Widget Position and Preview
By default, the widget appears as a floating chat bubble in the bottom-right corner of your site. If you’d like to place it somewhere else, use the data-render attribute in your script and specify a CSS selector (e.g., #custom-container) to mount the widget in a different location. Want a full-screen chat instead? Add the data-full-screen="true" attribute to your script.
You can preview your AI agent by clicking the preview icon in the AI Agents tab. Test it out by asking typical questions like pricing, business hours, or product details to confirm your knowledge base is functioning as expected. If the widget doesn’t show up during testing, check for an "invalid data-chatbot-id" error in your browser’s console or ensure your Content Security Policy allows https://chat.chatspark.io.
| Attribute | Description |
|---|---|
data-chatbot-id |
Required. Your unique agent ID from the dashboard. |
data-is-open |
Set to "true" to open the chat automatically on page load. Default is false. |
data-ga-id |
Add your Google Analytics 4 measurement ID to track chat events. |
data-full-screen |
Set to "true" to render the widget as a full-screen interface. |
data-render |
Specify a CSS selector (e.g., #container) to mount the widget in a specific location. |
Step 5: Test and Activate Your AI Agent
After setting up and customizing your AI agent, it's time to ensure it performs as expected. Testing is crucial to confirm that the agent works seamlessly across devices and scenarios before going live.
Run Test Conversations
Use the AI Preview tool in your ChatSpark dashboard to simulate customer interactions. Start by testing the basics like the welcome message and greeting flow. Then, move on to specific questions your customers are likely to ask - things like pricing, business hours, contact information, or return policies.
Pay close attention to how the agent handles unexpected or out-of-scope questions. Ideally, it should either connect the customer to a human representative or collect their contact details for follow-up. If you notice the AI responding with "I don't know" or providing incorrect information, update your knowledge base and retrain the model immediately.
Test how the agent manages escalation triggers by using keywords that should prompt a handoff to a live agent. Create a checklist to cover common scenarios, but don’t stop there - test edge cases with tricky or unusual questions. These tests often reveal gaps in your training data, allowing you to address them before real customers encounter issues. Document any problems and refine your training content accordingly.
Check Your Analytics Dashboard
Once your test conversations are complete, dive into the analytics section of your dashboard. Review conversation logs to track the flow of interactions and ensure the agent is giving accurate responses. Pay special attention to the unanswered questions metric, as this highlights areas where your knowledge base needs improvement.
Look at the predicted intents or use cases for each test message. These should align with what customers are actually asking. A confidence score of 0.75 or higher indicates the AI is confident in its response. Anything lower should prompt the agent to escalate to a human rather than risk an incorrect answer. Identify drop-off points where conversations ended abruptly - these often signal confusing dialogue paths that need tweaking.
Monitor the hallucination rate, which measures how often the AI provides false information. This should stay under 2%. If it’s higher, revisit your knowledge base to remove outdated or inaccurate content and adjust confidence thresholds. On average, a well-tuned AI agent can resolve 60–75% of general FAQ inquiries. For example, a 2025/2026 audit of 2,400 support tickets for a B2B SaaS platform by PxlPeak revealed that automating Tier 1 queries resulted in an 84% automation opportunity, saving the company $4,200 per month in human agent costs[8].
"The gap between a working AI customer service system and a broken one is not the AI model. It is the knowledge base quality, the tier classification, and the guardrails."
- John V. Akgul, Founder & CEO, PxlPeak[8]
With your metrics in check, you’re ready to activate your agent.
Make Your AI Agent Live
Once testing is complete, proceed with activating your AI agent. The embed script you implemented during Step 4 is already in place, so the agent should now appear on your website. Visit your site to confirm the chat bubble is visible where expected and functions correctly across all pages.
Perform a final round of live testing by interacting with the agent as if you were a customer. Ensure it provides accurate responses, displays lead capture forms when needed, and integrates smoothly with tools like Zapier or Freshchat.
Your AI-powered customer service agent is now live and ready to assist customers 24/7. During the initial days, keep a close eye on your analytics dashboard. This will help you identify new patterns or questions that might require updates to your training data. As more customers engage with the agent, you’ll gather valuable insights to further refine its performance and boost resolution rates.
ChatSpark Pricing Plans
Once you've set up your AI agent, you can pick from four pricing options tailored to fit your business needs. Here’s a quick breakdown:
- Basic Plan: At just $19 per month, this option is ideal for solo entrepreneurs needing a straightforward website chatbot.
- Plus Plan: For $59 per month, you’ll get increased message capacity and access to the REST API, perfect for growing businesses.
- Pro Plan: Priced at $129 per month, this plan opens up omnichannel deployment (covering WhatsApp, Instagram, Facebook Messenger, Telegram, and Slack) and lets you remove ChatSpark branding from your widget.
- Enterprise Plan: Custom pricing is available for large-scale operations, offering unlimited team members and a dedicated account manager.
Key Notes:
- Message limits reset on the first day of every calendar month, no matter your sign-up date.
- Annual billing comes with a 14% discount, which is like getting almost two months free.
- A 14-day free trial is available for the Basic plan, but you’ll need to provide a credit card to activate it.
Each AI agent is tied to one specific channel. For example, if you want ChatSpark on both your website and WhatsApp, you’ll need separate subscriptions for each. Keep in mind that while most replies use 1 message credit, advanced AI models on Pro and Enterprise plans consume 20 message credits per reply. This feature can be powerful but requires careful monitoring of your usage.
Plan Comparison Table
| Feature | Basic | Plus | Pro | Enterprise |
|---|---|---|---|---|
| Monthly Price | $19 | $59 | $129 | Bespoke |
| Messages / Month | 100 | 250 | 2,000 | Bespoke |
| AI Agents | 1 | 1 | 1 | Bespoke |
| Pages / AI Agent | 25 | 50 | 500 | Bespoke |
| Team Members | 1 | 1 | 2 | Unlimited |
| AI Actions | None | 5 | 40 | Unlimited |
| Analytics | Basic | Advanced | Full Reporting | Full + Audit Logs |
| API Access | None | REST API | Full REST API | Full REST API + CRUD |
| Channels | Website | Website | Omnichannel* | Bespoke |
| Support | Priority | Dedicated Manager |
*Omnichannel covers Website, Instagram, Facebook Messenger, WhatsApp, Telegram, and Slack.
Conclusion
This guide has walked you through just how easy it is to set up an AI agent on your website in minutes.
From creating your ChatSpark account to making your AI agent live, the process is straightforward and quick - taking less than 10 minutes. Best of all, you don’t need any coding skills to make it happen. Simply train the agent with your content, tweak its appearance and tone, and embed a single code snippet onto your site.
The benefits are immediate. ChatSpark’s AI Engine is built to deliver resolution rates of over 80% right from the start [1]. Real-world success stories show it can manage hundreds of chats monthly, saving both time and resources.
You can start with a 14-day free trial to explore all the features risk-free. With just an email and payment details, you’ll unlock full access, including an analytics dashboard, multilingual support for over 95 languages, and the ability to train your agent using multiple data sources.
Once you see the results for yourself, scaling is simple. Paid plans start at $19 per month for the Basic plan, offering everything you need to keep customer inquiries handled 24/7. Whether you’re a solo entrepreneur or part of a growing team, ChatSpark adjusts to fit your needs.
FAQs
How do I stop the AI from giving wrong answers?
To minimize incorrect answers, it's crucial to ensure your AI system is well-configured and consistently maintained. Here are some key areas to focus on:
- Accurate knowledge bases: Make sure the AI relies on reliable, up-to-date sources of information to provide correct responses.
- Clear instructions: Set precise guidelines for the AI to follow, ensuring it aligns with your goals and expectations.
- Frequent updates: Regularly review the AI's performance, refine its training data, and make adjustments as needed to address gaps or inaccuracies.
- Dependable integrations: Link the AI to trusted tools, such as CRMs, to ensure it pulls accurate and relevant data.
Additionally, conducting thorough testing before deployment can significantly enhance the system's reliability and reduce errors.
What should I include (and exclude) in the training content?
When preparing your AI customer service agent, make sure to include essential content such as FAQs, detailed product information, and key support topics. These elements are crucial for delivering accurate and helpful responses. Pull from resources like your website and customer-facing documentation to create a knowledge base that aligns with real customer needs.
At the same time, leave out sensitive or irrelevant material, such as internal company data or confidential information. Including such content could lead to errors or responses that aren't appropriate. Instead, focus solely on content that improves the AI's ability to assist customers effectively and efficiently.
How do I connect the chatbot to my CRM or booking tool?
To link your chatbot with your CRM or booking tool, you can use automation or API connections. Most platforms make this process straightforward by offering tools to authenticate accounts and set up triggers and actions for smooth data sharing.
Start by selecting the integration feature within your chatbot platform. Then, connect your CRM or booking tool and tailor workflows to streamline how data is exchanged.