AI chatbots can transform your website by providing instant, 24/7 customer support. They answer FAQs, process inquiries, and boost conversions - delivering responses in under 3 seconds. Businesses using chatbots report a 30% reduction in customer service costs and a 2.8x higher visitor conversion rate. For example, in 2025, TechStyle saved $1.1 million in operational costs with an AI chatbot.
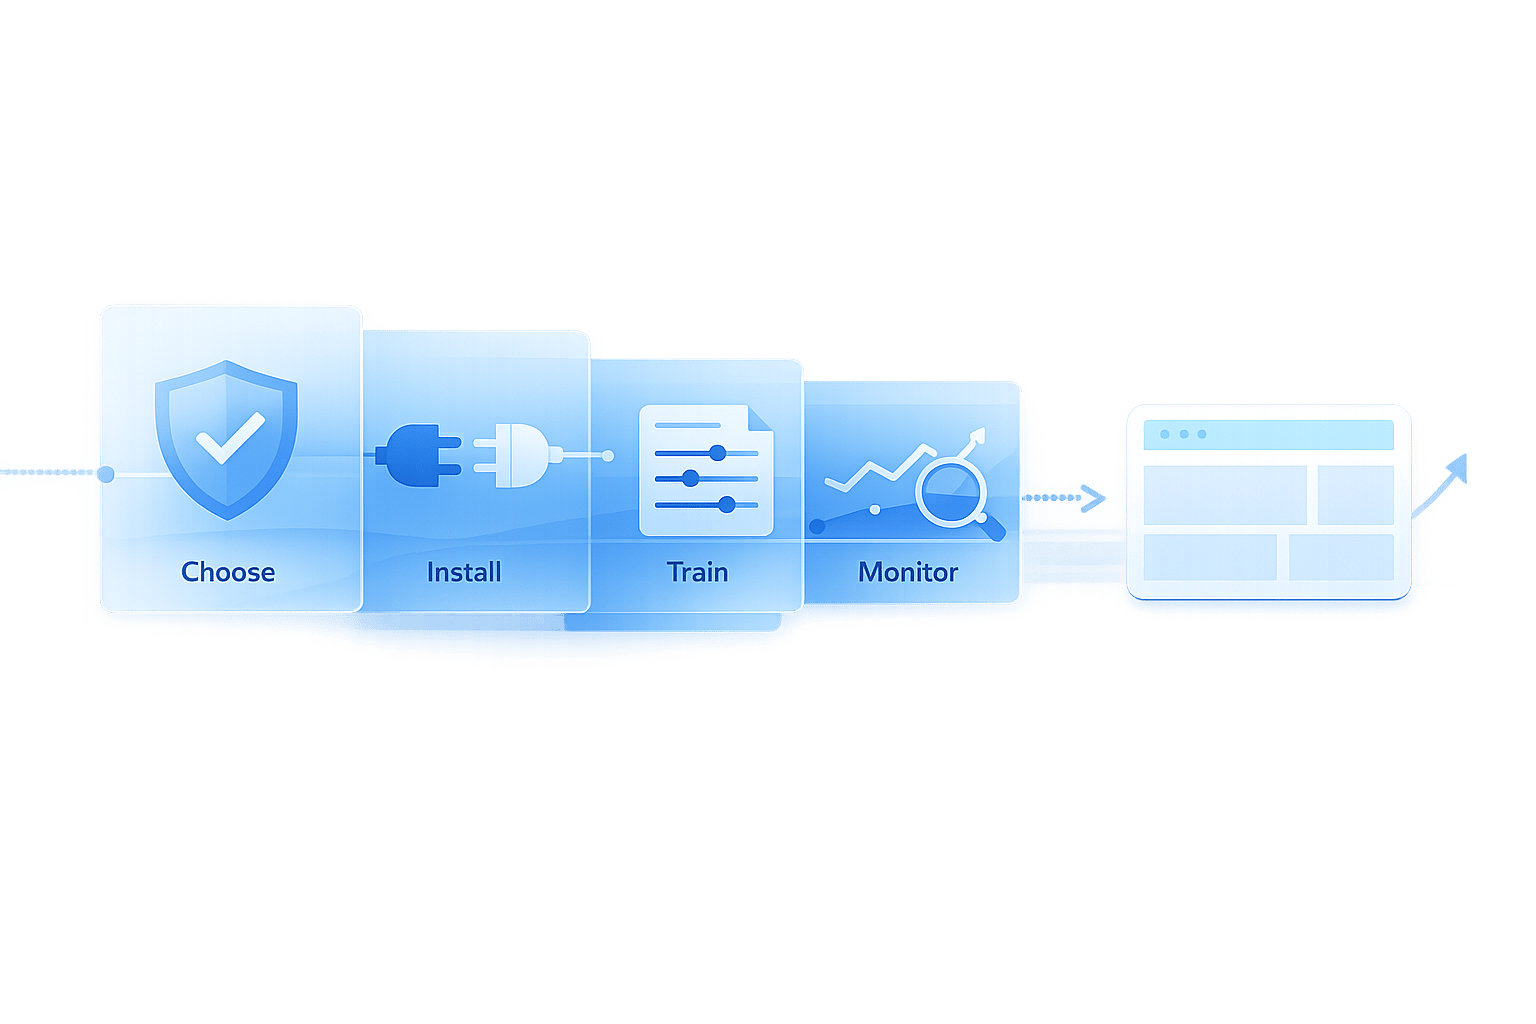
This guide explains how to set up ChatSpark, a platform designed to automate customer support with high efficiency. Plans range from $19/month for basic needs to custom Enterprise solutions. ChatSpark supports 85+ languages, integrates with platforms like WhatsApp and Slack, and can be installed in minutes. Key steps include:
- Choosing a Plan: Options include Basic, Plus, Pro, and Enterprise, each catering to different business sizes and needs.
- Installing the Widget: Add ChatSpark to your site via a simple code snippet or plugins for platforms like WordPress or Shopify.
- Training Your AI: Upload FAQs, product manuals, or use website crawling to equip the bot with accurate responses.
- Customizing Appearance: Align the chatbot’s tone, color, and design with your brand identity.
- Monitoring Performance: Use analytics to track metrics like resolution rates and knowledge coverage.
ChatSpark simplifies customer support, reduces costs, and increases efficiency. Start small with a free trial and expand as needed.
Step 1: Select Your ChatSpark Plan
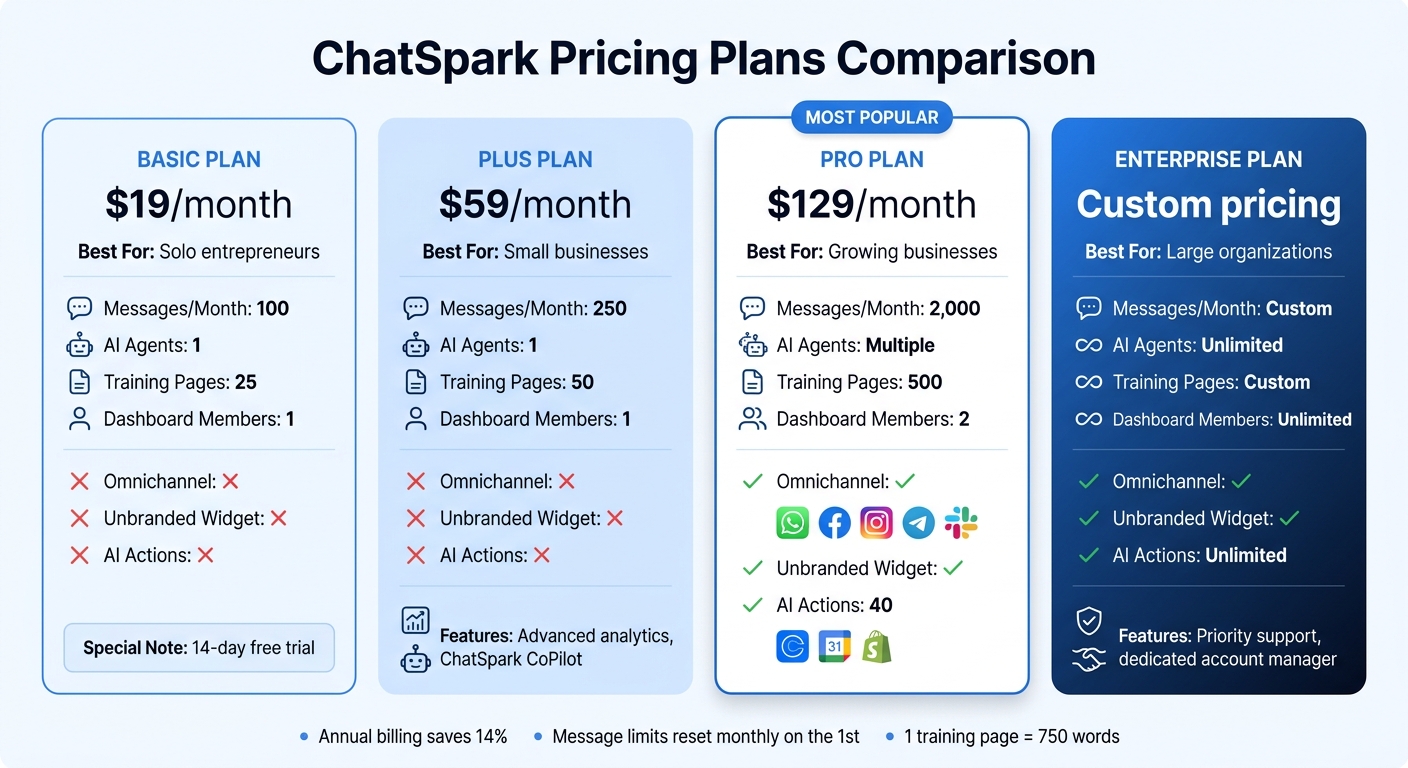
ChatSpark Pricing Plans Comparison: Features and Costs
ChatSpark Pricing Plans Explained
ChatSpark offers four pricing options tailored to fit different business sizes and support needs. The Basic plan, priced at $19/month, is perfect for solo entrepreneurs exploring conversational AI. It includes 100 messages, 1 AI agent, and 25 training pages. The Plus plan, at $59/month, steps things up with 250 messages, 50 training pages, advanced analytics, and access to ChatSpark CoPilot for internal team collaboration.
For businesses needing more scalability, the Pro plan at $129/month delivers 2,000 messages, 500 training pages, and omnichannel deployment across platforms like WhatsApp, Facebook Messenger, Instagram, Telegram, and Slack. This plan also removes ChatSpark branding from your widget and includes 40 AI Actions for automating tasks like booking appointments through Calendly or checking Shopify order statuses. Finally, Enterprise plans provide custom message limits, unlimited AI Actions, priority support, and a dedicated account manager. Pricing for Enterprise plans is customized based on your specific requirements.
| Plan | Monthly Price | Messages/Month | Training Pages | Omnichannel | Unbranded Widget |
|---|---|---|---|---|---|
| Basic | $19 | 100 | 25 | No | No |
| Plus | $59 | 250 | 50 | No | No |
| Pro | $129 | 2,000 | 500 | Yes | Yes |
| Enterprise | Custom | Custom | Custom | Yes | Yes |
Each AI agent is tied to a single communication channel. For instance, if you want ChatSpark on both your website and WhatsApp, you’ll need separate agent slots. Message limits reset on the first of each month, and annual billing offers a 14% discount.
"ChatSpark has been managing two of our largest product lines over the past year. It currently handles an average of 1,831 chats per month without any human intervention. Since implementing it on our website, we've realized measurable savings of $119,225." - Lorri G., Customer Service & Technical Support Manager [8]
What to Consider When Choosing a Plan
To pick the right plan, start by estimating your monthly message volume. For example, if your website gets around 500 visitors monthly and 20% engage with the chatbot, you’d average 100 interactions - making the Basic plan a good fit. If your business handles over 1,000 inquiries monthly, the Pro plan ensures you won’t hit message caps mid-month.
Next, think about your training data needs. ChatSpark defines one "page" as 750 words, and it supports multiple file types like PDFs, URLs, and Google Docs. For example, a 50-page product manual would nearly exhaust the Basic plan’s training page allocation. Collaboration also matters: Basic and Plus plans allow one dashboard member, Pro supports two, and Enterprise includes unlimited seats.
If you need workflow automation - like syncing with Calendly or checking Shopify orders - you’ll want access to AI Actions, which are only available in Pro and Enterprise plans. Additionally, while Basic and Plus plans are limited to website embeds, Pro and Enterprise offer deployment across social media and messaging platforms.
Finally, take advantage of the 14-day free trial on the Basic plan to test the chatbot’s accuracy before committing to a paid plan.
Once you’ve chosen your plan, the next step is installing ChatSpark on your website.
Step 2: Install ChatSpark on Your Website
Sign Up for ChatSpark
Head over to chatspark.io/pricing, choose the plan that fits your needs, and enter your email to complete the checkout process. If you're unsure, the Basic plan includes a risk-free 14-day trial to get you started [6]. Once you've signed up, check your inbox for a welcome email with your login details.
After logging in, navigate to the "AI Agents" section in the sidebar and click "Create AI Agent" to begin setting up your chatbot. The setup wizard will guide you through four key steps: Training Sources, Settings, AI Actions, and Deployment. Right from the start, ChatSpark's AI Engine boasts an impressive resolution rate of over 80%. For even better performance, you can train your agent using your FAQ or common support topics [6].
Once your agent is ready, it's time to integrate it into your website by adding the ChatSpark widget.
Add the ChatSpark Widget to Your Site
Now that your ChatSpark account is set up, it's time to bring your chatbot online by embedding the widget on your site. Here's how:
- In your dashboard, go to the AI Agents tab and click the code icon next to your agent.
- Authorize the widget by entering your website's domain.
- Copy the embed script provided and paste it into your website's HTML, just before the closing
</body>tag on each page where you'd like the chatbot to appear.
Using WordPress? Skip the hassle of manual coding! Simply install the official ChatSpark plugin from the WordPress plugin directory, activate it, and enter your AI Agent ID (available in your dashboard) under WordPress Admin → ChatSpark. The widget is also compatible with platforms like Shopify, Squarespace, Wix, and any system that supports custom JavaScript.
For websites with strict Content Security Policies (CSP), make sure to add https://chat.chatspark.io to your script-src and frame-src directives. This ensures the widget loads without any issues [10].
Before going live, test your chatbot by using the preview icon in the dashboard. Try out common customer questions to see how it performs. To create additional entry points for visitors, you can add class="cs-trigger-agent" to any button or link on your site, allowing users to open the chat from multiple locations.
Step 3: Train and Customize Your ChatSpark Chatbot
Upload Your Business Data
The success of your chatbot hinges on the quality of the data you provide. To ensure accurate, on-brand responses, ChatSpark offers four main training methods: file uploads, website crawling, a rich text editor, and integration with helpdesk platforms. Supported file types include PDFs (text-based), Word documents (.doc, .docx), PowerPoint files (.ppt, .pptx), CSVs for product catalogs, and plain text files (.txt). The rich text editor allows for quick updates, keeping your bot up-to-date with minimal effort.
A great starting point is uploading your FAQ page and addressing common support topics - these usually cover the bulk of customer inquiries. You can also crawl your website, either the entire domain or specific URLs like product guides or return policies. For users of popular helpdesk platforms, ChatSpark integrates effortlessly and automatically excludes personal data during training [11][12].
The AI retrains within 1–5 minutes after updates, with every 750 words counted as one training page. Be sure to check your plan for training page limits. To optimize performance, structure your documents with headings, lists, and clear formatting, and include variations of common customer questions to improve intent recognition.
After uploading and organizing your data, the next step is to fine-tune your chatbot’s appearance and settings to align with your brand identity.
Customize Settings and Appearance
Now that your chatbot is equipped with the right responses, it’s time to make sure it looks and sounds like an extension of your brand. In the Settings tab, you can adjust the chatbot’s primary color, upload a custom avatar (an image or icon), and set a public-facing "Agent Name" that customers will see in the chat widget. The chat bubble can be placed on the bottom-right or bottom-left of your website, and you can tweak the chatbot’s personality and tone of voice - whether you want it to be formal, casual, or somewhere in between. These adjustments help maintain consistency with your brand’s digital presence, enhancing customer trust and engagement.
ChatSpark also supports over 85 languages with automatic detection at 99.9% accuracy. Even if your bot is trained in English, it can respond in Spanish, Japanese, Arabic, or the preferred language of your customers. You can further enhance customer interactions by setting up AI-powered lead capture forms to collect names, emails, phone numbers, and other custom fields. Add up to five suggested prompts to make it easier for visitors to start a conversation, and craft a welcoming message that guides them from the start.
For businesses on the Pro plan ($129/month) or Enterprise plan, you can remove ChatSpark branding entirely, creating a fully white-labeled experience. Additionally, you can use the cs-trigger-agent class on custom buttons or links to provide multiple entry points across your site, ensuring customers can easily start a chat whenever they need assistance.
Step 4: Test, Deploy, and Improve ChatSpark
Test Your Chatbot Responses
Before rolling out your chatbot, use the preview icon in your dashboard to ensure it delivers accurate and helpful responses [6]. Start with a basic testing checklist, covering key topics like pricing, business hours, contact details, and return policies. If your chatbot struggles with any of these, update its training data right away [6].
Don't stop at the basics - test for both common and edge-case scenarios. For example, ask about a product or service that isn’t documented to see how the bot handles unknown queries. Push its boundaries by trying to override its instructions, ensuring it stays within the intended business scope [13]. Testing on various devices, such as iOS and Android, is also essential to confirm that the chatbot interface doesn’t interfere with key elements and remains user-friendly [3][13].
Once you're confident in its performance, you're ready to deploy ChatSpark across your chosen channels.
Launch ChatSpark on Multiple Channels
To deploy, use the code snippet provided in your dashboard to add the website widget [6]. ChatSpark supports six major platforms: Website, WhatsApp Business, Facebook Messenger, Instagram DMs, Telegram, and Slack [9]. Each chatbot agent is tied to a specific platform, so if you want to cover multiple channels, you’ll need separate agents for each. However, they can all share the same training data [9]. Begin with your website widget, then expand to the platforms your audience uses most [9].
For added functionality, integrate tools like Calendly or Google Calendar into the chat flow to handle bookings, or use Freshchat to escalate complex queries to live agents [9]. You can also create custom entry points by adding class="cs-trigger-agent" to buttons or links on your site [6].
Once your chatbot is live on multiple platforms, focus on monitoring its performance to keep improving.
Monitor Performance with Analytics
The analytics dashboard is your go-to tool for tracking chatbot performance, identifying gaps, and measuring ROI [14]. Two critical metrics to monitor are:
- AI Resolution Rate: Tracks the percentage of chats resolved without human intervention. Aim for a healthy range of 70–85% [14].
- Knowledge Coverage: Measures how many questions your chatbot can confidently answer. A score above 80% is considered strong, while anything under 70% signals a need to update training data [14].
| Metric | Definition | Target Benchmark |
|---|---|---|
| AI Resolution Rate | % of chats resolved without human help | 70–85% [14] |
| Knowledge Coverage | % of questions the AI can answer confidently | 80%+ (High) [14] |
| Cost Savings | Dollar amount saved via automation | Based on $30/hr agent cost [14] |
The dashboard also highlights "Most Asked Questions" to help you spot popular topics and "Top Unanswered Questions" to guide updates to your training data [14]. Review these unanswered questions weekly, adding 2–3 new training items each time [14]. For Pro and Enterprise users, Google Analytics 4 integration lets you track events like chat session starts and lead captures alongside your broader website metrics [7]. Additionally, ChatSpark sends automated monthly ROI reports to your email, showing time and cost savings based on an average agent cost of $30/hour [14].
Conclusion
You can deploy ChatSpark in under 10 minutes and start seeing measurable results almost immediately [6]. However, its long-term performance hinges on the quality of its training data. High-quality inputs, like FAQs, product documentation, and support content, can push resolution rates beyond 80% [6].
"The resolution rate difference... is entirely driven by knowledge base quality and retrieval precision. Spend more time on your knowledge base than on your UI." - John V. Akgul, Founder & CEO, PxlPeak [5]
This highlights the critical role of a well-maintained knowledge base. To ensure ChatSpark's success, continuous optimization is key. Regularly review your analytics dashboard, especially during the first two weeks after launch, to identify gaps in responses and update your knowledge base accordingly [6]. This ongoing effort is what separates chatbots that effectively reduce customer service costs by up to 30% [1] from those that leave users frustrated due to incomplete answers.
The business benefits are hard to ignore. Websites equipped with chatbots report 35–45% more lead captures compared to static contact forms, and visitors who interact with chatbots convert at a rate 2.8 times higher [2]. Additionally, 73% of consumers prefer using chatbots or live chat for quick questions over traditional channels like phone or email [2]. By leveraging ChatSpark, your business can meet these expectations, offering instant, round-the-clock support.
Start small - focus on a single use case, validate its performance, and then expand systematically. ChatSpark’s Retrieval-Augmented Generation (RAG) technology [4], combined with your commitment to regular updates, can deliver a customer support experience that builds trust, captures leads, and scales with your needs. Follow our step-by-step guide to create a support system that consistently delivers results.
FAQs
How can I estimate how many chatbot messages I’ll need each month?
To figure out your monthly chatbot message count, begin by estimating how many messages you typically handle in a day based on customer interactions. Then, multiply that daily figure by the number of days in the month to get a rough estimate.
As you go, monitor your actual usage to fine-tune your projections. Starting with a smaller estimate and adjusting over time helps you stay aligned with actual usage patterns, making it easier to manage both costs and resources.
What’s the best way to keep my chatbot’s answers accurate as my website changes?
To ensure your chatbot provides accurate answers, keep its knowledge base up to date with your latest content - things like service pages, FAQs, and policies. Start by reviewing and organizing your source material to create high-quality training data. Use your website's most current content, upload relevant files, and test responses to key questions. Regularly reviewing and updating this information will help your chatbot stay in sync with your website.
When should I use multiple AI agents for my website and other channels?
Using multiple AI agents can be a game-changer for customer support, especially when handling complex or high-volume inquiries or managing support across multiple platforms. By assigning agents to specific channels - like your website, WhatsApp, or email - you can provide more tailored responses and streamline routing.
This setup not only boosts response accuracy and speeds up support but also lightens the workload for human teams. Plus, features like automatic language detection and channel-specific assistance ensure a smoother, more personalized experience for users.